Showing a price filter on the WooCommerce shop page helps shoppers narrow products by budget and find suitable items faster. You can do this in three main ways: with the default WooCommerce option, a price filter plugin, or custom code.
If you are wondering how do i show price filter on WooCommerce shop page and which methods are right for me, this guide is for you. Keep reading to understand each method clearly and choose the one that fits your shop best.
Quick Tips
A few quick checks can make the WooCommerce price filter easier to set up and help it work properly from the start. Here are the key things to review before choosing a method.
- Use the default WooCommerce option for a simple price filter
- Choose a plugin for more control and AJAX filtering
- Use custom code for advanced price filter changes
- Place the filter in a visible shop page area
- Test it to make sure products update correctly
What To Do Before You Add A Price Filter To WooCommerce
Before adding a price filter, make sure your products already have prices set in WooCommerce. The filter depends on existing product prices, so missing or incorrect values can stop it from showing the right range, return inaccurate results, and make it harder to fix slow price filter issues later.
- Check Product Prices First: Make sure each product has a regular price or sale price saved properly.
- Confirm Products Are Visible: Products should be published and available on the shop page.
- Look At The Price Range: A wider mix of product prices makes the filter more useful for shoppers.
- Update Lookup Tables When Needed: After bulk imports or large price changes, refresh WooCommerce lookup tables before testing the filter.
How Do I Show Price Filter on WooCommerce Shop Page?
You can show a price filter on the WooCommerce shop page in three simple ways, depending on how much control you need. Some stores use the default WooCommerce option, while others use a plugin or custom code for more flexibility. Below, we will walk through each method step by step.
Method 1: Show Price Filter Using the Default WooCommerce Option
WooCommerce includes a built-in price filter option for basic shop page filtering. This method is useful when you want a simple setup without adding a plugin or using custom code.
Step 1: Open the Widget Area
- Go to Appearance → Widgets.
- Find the widget area for your shop sidebar.
Step 2: Find the WooCommerce Sidebar
- Open the WooCommerce Sidebar or Shop Sidebar.
- Make sure your theme displays a sidebar on shop pages.
Step 3: Add the Price Filter
- Click the plus icon to add a block or widget.
- Search for Product Filters.
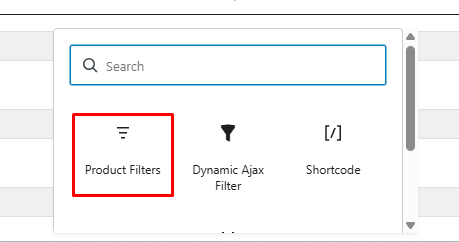
Step 4: Place the Filter in the Sidebar
- Add the product filter to the sidebar.
- Keep the price filter and remove the rest.
Step 5: Save the Changes
- Click Update or Save.
- Confirm the filter is active.
Step 6: Check the Shop Page
- Open the shop page on the front end.
- See if the price filter appears correctly.
Step 7: Test the Filter
- Choose a price range.
- Make sure the products update correctly.
Method 2: Show Price Filter Using a Plugin
Plugin-based setup gives you more control over how the price filter looks and works on the shop page. For stores that need easier styling, flexible placement, like Dynamic AJAX Product Filters for WooCommerce, is a practical choice.
Step 1: Install the Plugin
Dynamic AJAX Product Filters for WooCommerce is a practical option for showing a price filter on your shop page without coding. It supports AJAX-based filtering for faster product updates and gives store owners a simple way to add price filtering without making the shop layout feel cluttered. The free version is enough for basic price filter setup, which makes it a good starting point for many WooCommerce stores.
Option A: Install From the WordPress Dashboard
This is the easiest way to install this WooCommerce price filter plugin. Everything stays inside your dashboard. Just follow the steps one by one. Make sure the plugin is activated at the end.
- Go to WordPress Admin Dashboard > Plugins, then click Add New Plugin.
- In the search bar, type Dynamic AJAX Product Filters for WooCommerce.
- Click Install Now, then click Activate.
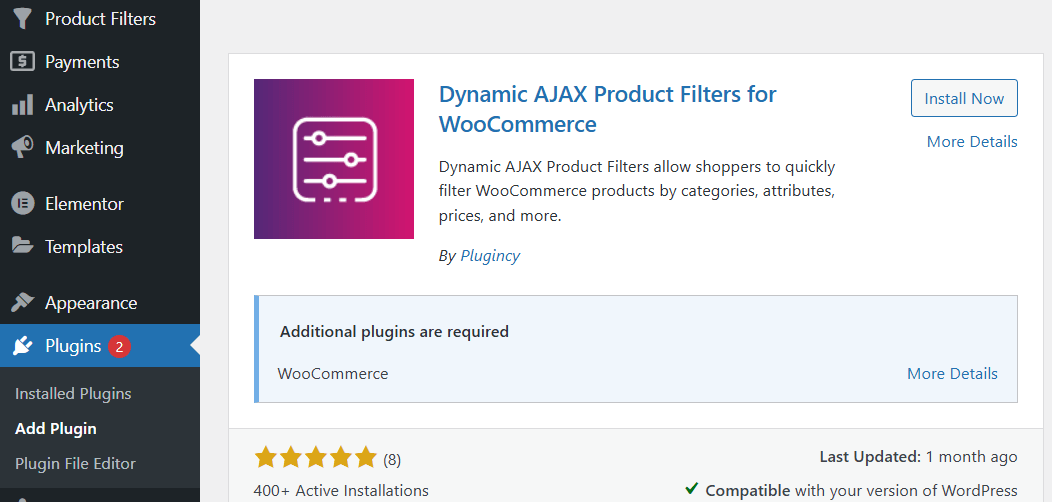
Once activated, the plugin settings will appear in your dashboard.
Option B: Upload the Plugin ZIP File
If you prefer manual upload, this method works fine. It is also useful when the search does not show results. Just make sure the file stays zipped. After activation, everything works the same.
Download the plugin ZIP file from the WordPress directory. Go to Plugins > Add Plugin > Upload Plugin. Upload the ZIP file, then click Install. After that, click Activate.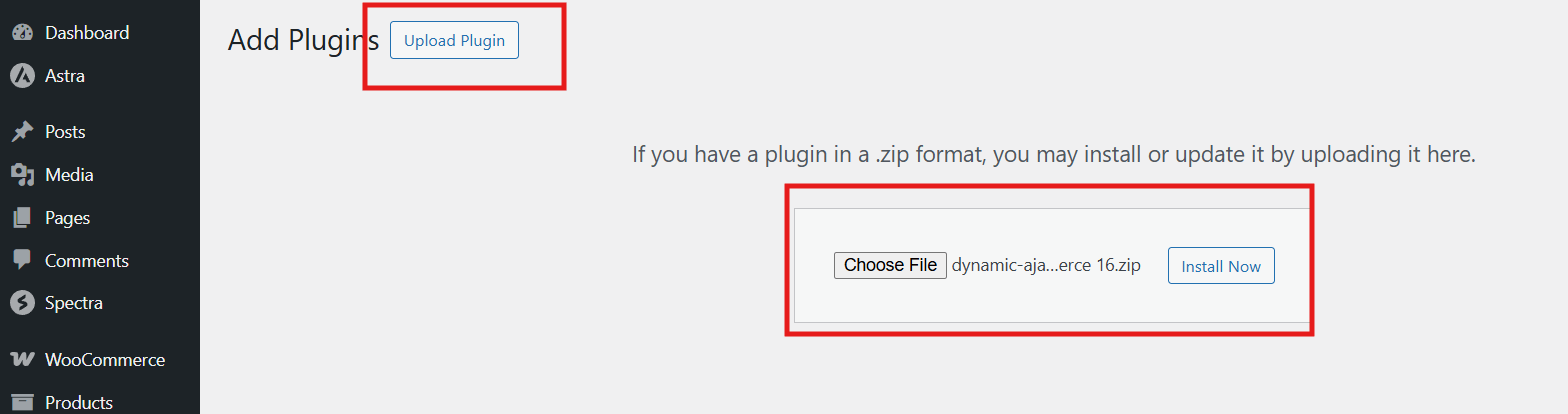
Step 2: Enable the Price Filter
Now that the plugin is installed, the next step is to enable the price filter. You’ll notice a new menu added to the dashboard. This is where all filter settings live. We just need to turn on the price option.
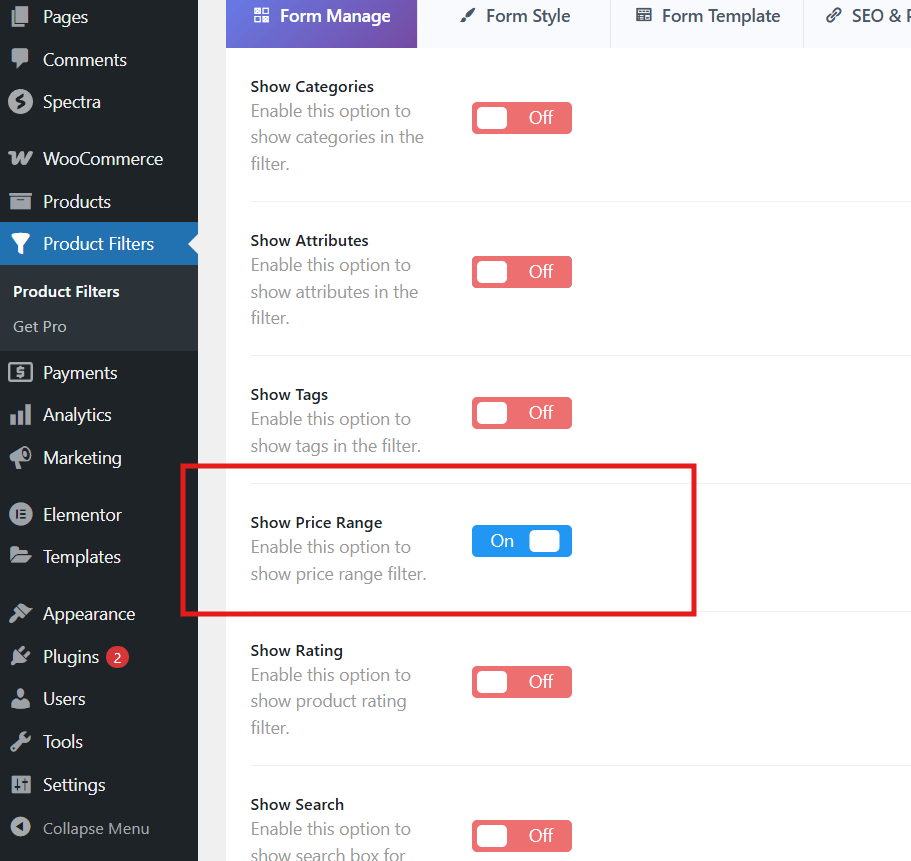
Go to Product Filters > Form Manage. Look for Show Price Range and enable it.
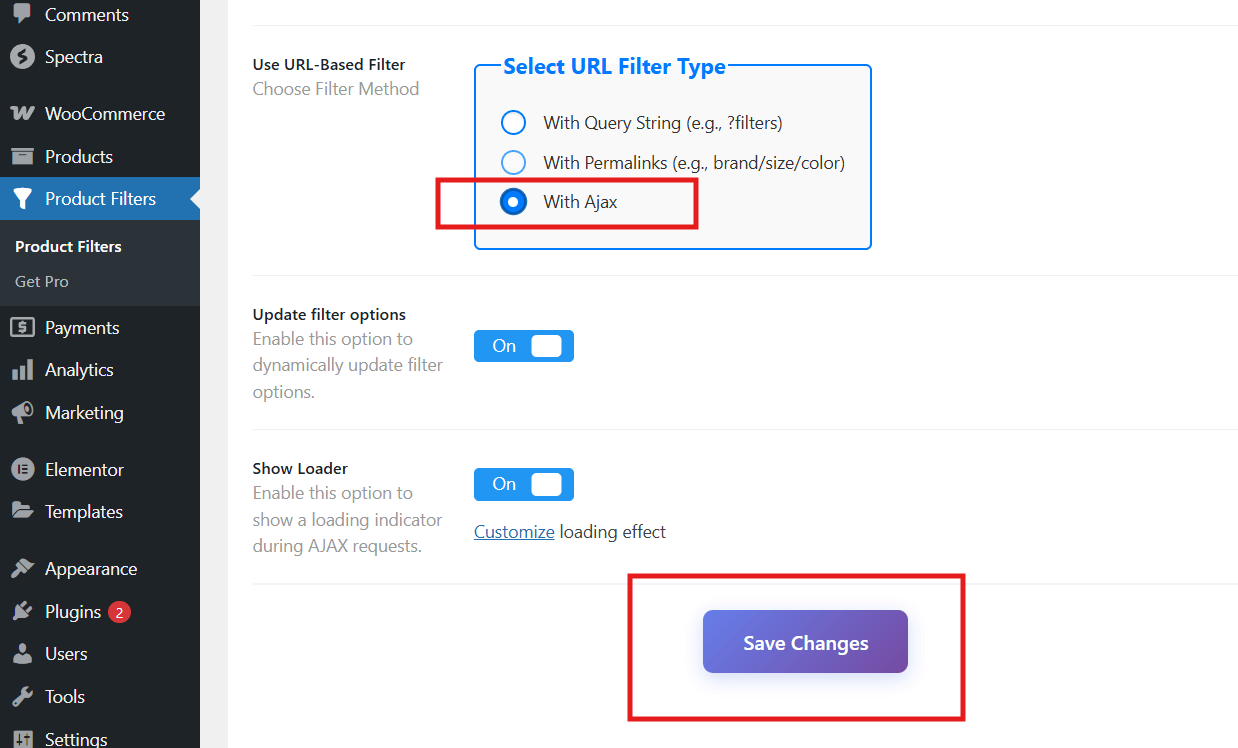
Scroll down until you see Select URL Filter Type. Here, with AJAX is a popular choice right now. Select any option you prefer, then click Save Changes.
At this point, the price filter is enabled.
Step 3: Display the Price Filter on the Shop Page
After enabling the filter, it still needs to be displayed. This part is done using widgets. It’s simple and does not take much time. Once added, the filter will appear on the shop page.
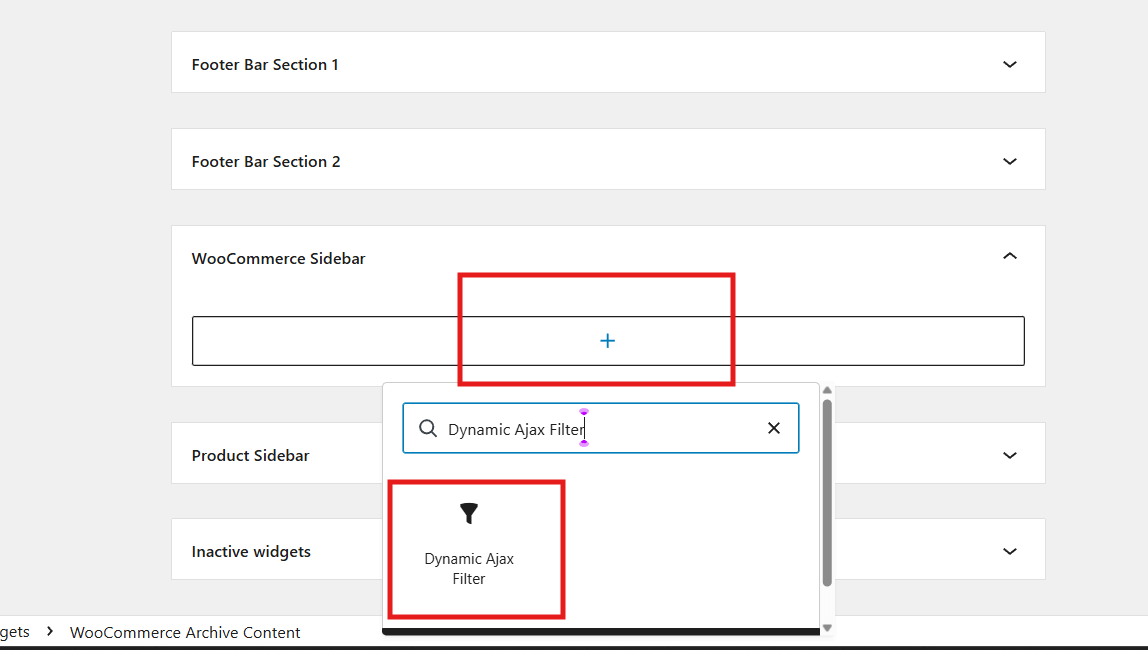
- Go to Appearance > Widgets, then click the + icon.
- Search for Dynamic Ajax Filter, add the block, and click Update.
Now visit your shop page. You should see the price filter showing there.
Step 4: Test the Filter and Confirm It Works
Before moving forward, take a moment to test the filter. This helps avoid issues later. Try selecting different price ranges. The products should update correctly.
Sometimes websites face small technical glitches. If it does not work, check each step again. Make sure settings were saved properly. If the issue still persists, contact the plugin support team. They are responsive and helpful.
Step 5: Customize the Price Filter Style
Once everything works fine, you can customize the filter style. This step is optional, but helpful. It lets the filter match your store design better. You can try different styles and choose one.
Go to Product Filters > Form Style. From the drop-down box, select Price. You will see several style options. Choose one, then click Save Changes. Reload the shop page and check the result.

That’s all you need to do to show a price filter on your WooCommerce shop page. The steps are simple, and the setup does not take much time. Just make sure each setting is saved properly before moving ahead. If something does not work, checking the steps again usually fixes it. Once everything is set, your shop visitors can filter products by price easily and smoothly.
Method 3: Show Price Filter with Custom Code
Custom code gives you more control when the default WooCommerce option or a plugin does not match your exact shop page needs. This method is useful for changing filter placement, styling, behavior, or integrating the price filter into a custom shop layout.
Step 1: Decide What You Want to Customize
- Choose whether you want to change the filter style, placement, label, or behavior.
- Keep the goal clear before editing any code.
Step 2: Add Custom CSS for Style Changes
- Use CSS if you only want to change how the price filter looks.
- Add the code in Appearance → Customize → Additional CSS.
.widget_price_filter {
padding: 12px;
border: 1px solid #ddd;
}
.widget_price_filter .price_slider_amount button {
width: 100%;
}
Step 3: Move the Price Filter with Hooks
- Use WooCommerce hooks if you want to place the filter in a custom area.
- Add the code in your child theme’s functions.php file or a code snippets plugin.
add_action(‘woocommerce_before_shop_loop’, ‘custom_price_filter_message’);
function custom_price_filter_message() {
if (is_shop()) {
echo ‘<div class=”shop-filter-note”>Use the price filter to narrow products by budget.</div>’;
}
}
Step 4: Customize the Widget Output if Needed
- Override the widget or sidebar output only if your setup requires a more custom layout.
- Use a child theme so theme updates do not remove your changes.
Step 5: Add JavaScript for Better Interaction
- Use JavaScript when you want to improve slider behavior or add custom interactions.
- Keep the script simple to avoid breaking the filter.
document.addEventListener(‘DOMContentLoaded’, function () {
const priceFilter = document.querySelector(‘.widget_price_filter’);
if (priceFilter) {
priceFilter.classList.add(‘custom-price-filter-ready’);
}
});
Step 6: Test the Price Filter Carefully
- Open the shop page and test different price ranges.
- Make sure the filter still updates products correctly.
Step 7: Keep Custom Code Safe
- Use a child theme or code snippets plugin.
- Avoid editing core WooCommerce files directly.
Should You Use The Default WooCommerce Price Filter Or A Plugin?
The right option depends on how much control you want over the filter experience on your shop page. WooCommerce’s built-in price filter works for simple setups, while a plugin is usually a better fit when you want more flexibility, styling control, or smoother filtering behavior.
| Feature Area | Default WooCommerce Price Filter | Plugin-Based Price Filter |
| Setup | Simple to add from widgets or blocks | Usually requires installation and basic setup |
| Design Control | Limited styling and layout control | More flexibility in appearance and placement |
| Filtering Experience | Basic filtering only | Often smoother, especially with AJAX support |
| Extra Filter Options | Mainly limited to the default price filter setup | Often includes price, category, attribute, and other filter types |
| Best Fit | Small stores with simple filtering needs | Stores that want more control and a better browsing experience |
For stores that only need a basic price filter, the default WooCommerce option may be enough. But if you want a cleaner filter layout, faster product updates, and more flexibility on the shop page, AJAX product filters for WooCommerce are usually the more practical choice.
Common Problems and Solutions With Price Filters On WooCommerce Shop Pages
Price filters help shoppers find products within their budget easily. But sometimes these filters do not work as expected. Small issues can confuse users and slow down shopping. Below you will find the most common problems and how to handle them.
Technical Caching And Performance Problems
Cached data can stop price filters from updating correctly and may cause old results to appear.
Solution: Clear WooCommerce transients, site cache, and any performance plugin cache before testing the filter again.
Theme Or Plugin Conflicts
Some themes or extra plugins can interfere with price filters and stop them from responding properly.
Solution: Disable non-essential plugins and test the filter with a default WooCommerce-friendly theme to isolate the issue.
Product Lookup Table Issues
Broken or outdated lookup tables can prevent the filter from returning the right products or any results at all.
Solution: Regenerate WooCommerce product lookup tables from the status tools after updates, imports, or bulk changes.
Incorrect Widget Or Block Placement
Price filters may appear without working properly when the widget or block is placed in the wrong area.
Solution: Place the filter in a visible shop or category page area and make sure it connects to the active product list.
Poor User Experience Setup
A confusing layout, unclear price range display, or missing reset option can make the filter harder to use.
Solution: Simplify the filter layout, show clear ranges, and keep the setup easy for shoppers to understand.
Where To Place The Price Filter On A WooCommerce Shop Page?
Price filters help shoppers control budgets while browsing products easily. Poor placement can make filters hard to notice or use. Smart placement improves browsing speed and reduces frustration. Read below to see the best placement options clearly explained.
Sidebar Placement For Easy Control
Sidebars are the most common place for price filters. They stay visible while shoppers scroll product lists. This makes adjusting price ranges quick and simple. In larger stores, many owners use WooCommerce multiple price filters in sidebars or top sections to help shoppers narrow results faster. Sidebars work best on desktop screens.

Top Section Placement For Quick Access
Placing the price filter at the top gives instant visibility. Shoppers see it before viewing any products. This works well for stores with frequent price-based browsing. Top placement reduces scrolling and saves time. It also pairs well with sorting tools like popularity or newest items.
Above Product Grid For Clear Focus
Some stores place price filters just above products. This keeps attention close to results. Shoppers adjust prices and instantly see changes. This placement feels natural and logical. It works well for smaller catalogs where filters should not feel hidden or distant.
Mobile Friendly Placement Matters
Mobile users need simple and clean layouts. Price filters should appear inside a toggle or slide panel. This saves screen space and avoids clutter. Buttons like Filter or Refine work best on mobile. Easy access keeps mobile users from leaving early.
Category Specific Placement For Better Relevance
Different categories may need different filter layouts. Price filters can appear only where pricing matters most. This avoids showing unnecessary options everywhere. Relevant placement keeps pages clean. Shoppers feel guided instead of overloaded with tools.
Price filter placement affects how shoppers browse and decide. Clear placement reduces effort and confusion. Desktop and mobile layouts need different approaches. Test placements to match your store layout and user behavior.
Commonly Asked Questions
Here are some common questions store owners ask after learning the basics. These answers clear small doubts that appear during real use. They focus on practical behavior, not setup steps. Read them to feel more confident using price filters correctly.
Does The Price Filter Work Automatically With Sale Prices?
Yes, price filters usually include sale prices by default. If a product is on sale, the filter reads the sale value. This helps shoppers see discounted items within their budget. Always test once to confirm your theme shows prices correctly.
Can I Show The Price Filter Only On The Main Shop Page?
Yes, the price filter can be limited to the shop page. This avoids showing it where it is not needed. Many stores keep category pages cleaner this way. Widget or block visibility settings control this behavior.
Will The Price Filter Affect Page Loading Speed?
A well built filter does not slow pages much. Problems happen when too many scripts load together. Using Ajax-based filters helps reduce reloads. Regular testing keeps speed issues under control.
Does The Price Filter Work For Logged Out Visitors?
Yes, price filters work for all visitors by default. Shoppers do not need accounts to use them. This keeps browsing open and simple. It also helps new visitors explore products faster.
Can I Hide Products With Zero Or Free Prices?
Yes, filters can hide free or zero priced products. This is useful for stores mixing paid and free items. It keeps results relevant to paying customers. Check the plugin or WooCommerce visibility settings for this option.
Is The Price Filter Affected By Currency Changes?
Price filters follow the active store currency. If currency changes, filter values adjust automatically. This keeps results accurate for different regions. Multi-currency plugins usually handle this smoothly.
End Note
Price filters play a strong role in helping shoppers stay focused while browsing products. When filters work properly, users feel in control and spend less time searching. This leads to smoother browsing, better decisions, and a shop page that feels clear instead of overwhelming.
So, how do I show price filter on WooCommerce shop page? The short answer is by using a reliable filter plugin, enabling the price option, and placing it correctly using widgets. This setup keeps filtering simple, fast, and easy to manage without coding stress.
Before closing, always test your price filter after updates and product changes. Keep layouts clean, avoid clutter, and check mobile views often. Small checks make a big difference over time. Wishing you steady sales, smooth filters, and happy shoppers ahead.