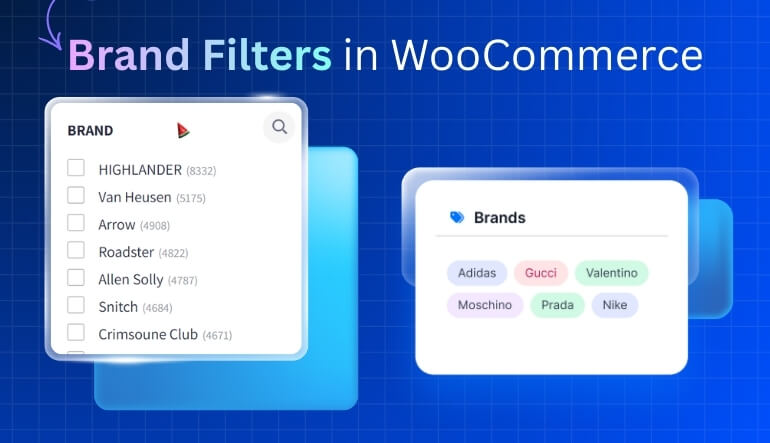
When you manage a WooCommerce store with multiple brands, product discovery can quickly become overwhelming for shoppers. That’s where the WooCommerce product filter by brand comes in, allowing customers to browse products by brand logos, names, or tags effortlessly.
In this guide, you’ll learn how to set up, customize, and optimize brand filters using both built-in and plugin-based solutions. We’ll also cover performance, SEO, and design best practices to help your brand filters boost engagement and sales.
What Does a Brand Filter Mean in WooCommerce?
A brand filter in WooCommerce is a navigation tool that lets customers view products from a specific brand. When users select a brand, the store dynamically displays all products under that label, helping them find trusted names faster.
Brand vs Category vs Attribute – Understand the Differences
- Brand: Represents the product’s manufacturer or supplier (e.g., Nike, Samsung).
- Category: Groups products by type (e.g., shoes, phones).
- Attribute: Defines product characteristics (e.g., color, size, material).
While categories organize your inventory, brand filters strengthen trust and loyalty.
Why Filtering by Brand Matters for Your Store?
- Builds trust: Shoppers can filter to their favorite brands instantly.
- Saves time: No need to scroll through unrelated products.
- Improves UX: Organized filters create intuitive navigation.
- Boosts conversions: Customers tend to buy from brands they recognize.
Adding a brand filter simplifies product discovery and reduces decision fatigue, especially for stores with many vendors.
Benefits of a Brand-Based Product Filter
Brand Trust, Conversion & Loyalty
Brand filtering enhances customer confidence. Shoppers looking for premium or familiar labels can find them in seconds, leading to quicker decisions and repeat visits.
Common Mistakes with Brand Filters
- Not assigning brands properly: Filters won’t show results if products lack brand taxonomy.
- Using only text lists: Logo-based filters often perform better visually.
- Ignoring mobile layout: Filters may break or hide behind collapsible menus.
Avoid these pitfalls to make your WooCommerce filter products by brand more user-friendly and visually appealing.
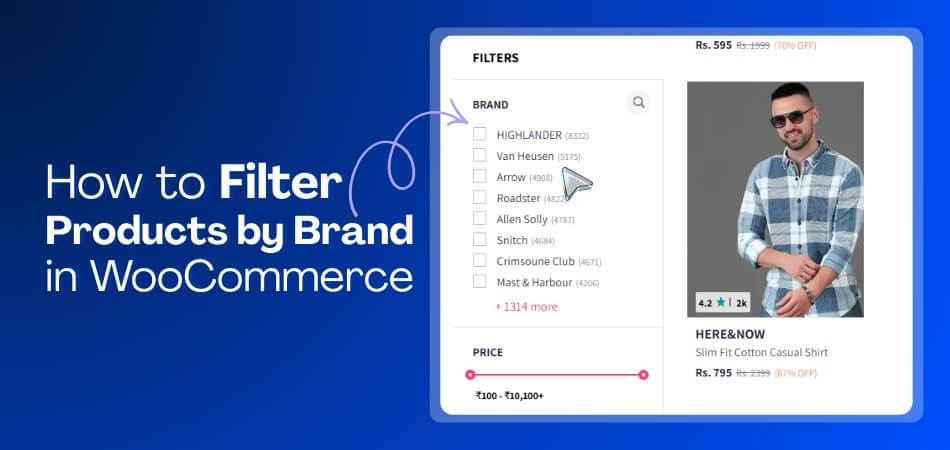
How to Set Up a Brand Filter in WooCommerce (No Code)
Brands make shopping easier when your store carries products from many makers. This guide shows how to set up a brand filter in WooCommerce with no code, using built-in options or a plugin.
Using the Built-in Brand Filter Block or Shortcode
If you’ve installed the WooCommerce Brands extension, you can add a brand filter directly through widgets or blocks:
- Go to Appearance → Widgets or Edit Page in Block Editor.
- Add the Product Filter – Brands widget/block.
- Choose display style: list, logo grid, or dropdown.
- Save changes and test your filter on the shop page.
When customers click a brand name, only products under that brand appear — instantly improving discoverability.
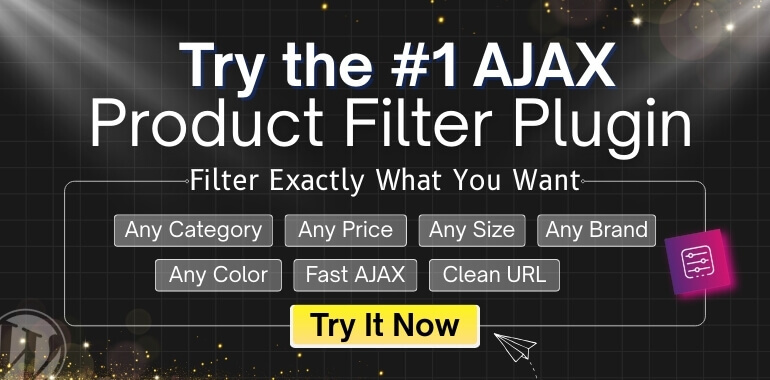
Installing a Plugin for Brand Filters (Recommended Plugins)
If your theme doesn’t include brand filters, use a plugin.
Here are the top picks:
- Dynamic AJAX Product Filters (Plugincy): Adds fast, AJAX-powered filters for brands, price, category, and attributes. Supports logos and custom designs.
- WOOF Product Filter: Provides brand filtering with AND/OR logic, multiple display options, and compatibility with Elementor.
- Barn2 Product Filters for WooCommerce: Offers advanced brand filtering with smart indexing for faster results.
Setup Steps:
- Install and activate the plugin like Dynamic AJAX Product Filters
- Go to Product Filters → Form Manage.
- Enable Show Brands (or Brands).
- Select brand display: logos or text.
- Enable multi-select if needed.
- Go to Product Filters → Form Style.
- Customize the brand filter design.
- Save and test on your store.
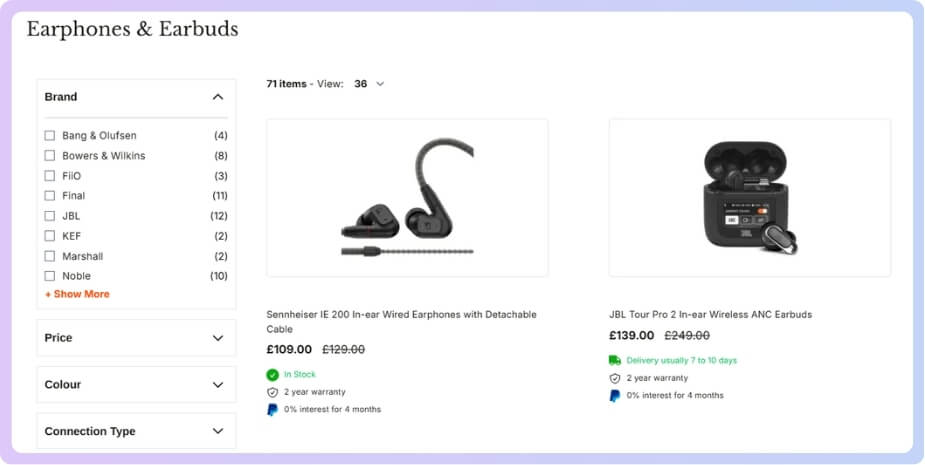
Choosing Filter Styles: Logos, Checkboxes, Dropdowns
- Logos: Eye-catching and ideal for fashion or electronics stores.
- Checkboxes: Simple, functional, best for long brand lists.
- Dropdowns: Compact, suitable for mobile-first design.
Well-structured layouts encourage more filter interaction, leading to higher conversions.
Advanced Setup: Brand + Other Filters, Logic & Performance
Combining Brand with Category, Price, Attribute Filters (AND/OR Logic)
To give customers flexibility, combine brand filters with others like price or size.
- AND logic: Products must meet all selected filters (e.g., “Nike AND Size 9”).
- OR logic: Displays items that match any filter (e.g., “Nike OR Adidas”).
Plugins such as Dynamic AJAX Product Filters make it easy to switch between these modes based on your audience’s behavior.
AJAX Filtering for Brand Selection & Instant Results
AJAX allows filters to update results instantly — no page reloads required.
Benefits:
- Faster product browsing and improved UX.
- Reduced server load on large stores.
- Smoother experience for mobile users.
This feature is especially valuable when customers use multiple brand filters at once.
Performance Tips for Large Catalogues & Brand-Heavy Stores
- Enable caching: Cache filtered results to reduce database queries.
- Index brand taxonomies: Improves query speed.
- Use lazy loading: Prevents long initial load times.
- Limit visible brand count: Add “Show More” to large lists.
SEO, UX & Technical Best Practices for Brand Filters
Clean Filter URLs, Canonicals & Indexation
Each brand filter generates a dynamic URL (e.g., /shop/?filter_brand=nike).
- Use canonical URLs to prevent duplicate content.
- Add noindex, follow for filter-based pages.
- Keep URL slugs clean and keyword-friendly.
This ensures search engines crawl efficiently while maintaining SEO value.
Mobile-First Design & Brand Filter Placement
Design filters where users expect them — typically:
- Sidebar on desktop.
- Collapsible top bar or drawer on mobile.
- Use sticky filters for long product lists.
Responsive designs improve accessibility and mobile usability.
Tracking Brand Filter Usage & Conversion Metrics
Use Google Analytics or GA4 to track how often visitors interact with brand filters.
Measure engagement, exit rate, and conversion differences between filtered and unfiltered sessions. This helps refine your filter placement strategy.
Practical Examples & Case Studies of Brand Filtering
Example: Multi-Brand Fashion Store – Brand Logos Filter
A fashion retailer using logo-based brand filters saw a 27% rise in engagement within a month. Customers stayed longer and explored more products, thanks to visual brand cues.
Example: Electronics Store – Brand + Feature Filter Together
An electronics store combined brand and feature filters (“Samsung + 64GB”). This combination improved conversion rate by 19% and reduced search drop-offs.
Troubleshooting Common Brand Filter Issues
Brand Filter Not Showing Products
If products don’t appear when filtering:
- Ensure products are correctly assigned to brand taxonomies.
- Re-save permalinks under Settings → Permalinks.
- Clear the cache and rebuild the product index if your plugin supports it.
Slow Performance or Broken Layout with Brand Filters
- Disable excessive AJAX requests.
- Limit filter combinations shown on one page.
- Test filter performance with the Query Monitor plugin.
Plugin Conflicts & Theme Compatibility
When filters malfunction:
- Check JavaScript console errors.
- Disable minification plugins temporarily.
- Use themes that support WooCommerce hooks (woocommerce_before_shop_loop).
Summary & Best Practice Checklist
Here’s a quick checklist before you finalize setup:
✅ Install a reliable brand filter WooCommerce plugin.
✅ Assign correct brand taxonomy to all products.
✅ Optimize URLs and canonical tags for SEO.
✅ Design responsive layouts with logos or dropdowns.
✅ Track analytics to measure brand filter usage.
✅ Test AJAX and caching regularly for speed.
When implemented correctly, your WooCommerce product filter by brand can elevate both user experience and sales potential.
Unlock Brand-Based Product Filtering for Your Store
Empower your customers to shop by trust and preference. Add a WooCommerce brand filter today with Dynamic AJAX Product Filters or a similar plugin, and create a faster, cleaner, and more brand-driven shopping journey that keeps buyers coming back.
Frequently Asked Questions (FAQs)
Brand filters are easy to set up, but a few small settings can change how they work and how they look on your store. These FAQs cover the most common questions so you can build a brand filter that is clear, fast, and reliable.
What Is a WooCommerce Product Filter by Brand?
A WooCommerce product filter by brand helps customers view products from specific brands, making shopping faster and more organized. It improves user experience and builds trust in known product labels.
How Do I Add a Brand Filter in WooCommerce?
You can add a brand filter using the built-in Product Filter – Brands widget or through a plugin like Dynamic AJAX Product Filters or Barn2 Product Filters for advanced control.
Can I Use Logos Instead of Text for Brand Filters?
Yes. Many plugins let you display brand logos instead of text names. Logo filters enhance visual appeal and are ideal for fashion, electronics, and multi-brand stores.
What Is the Best Plugin for Brand Filtering in WooCommerce?
Popular choices include Dynamic AJAX Product Filters (Plugincy), WOOF Product Filter, and Barn2 Product Filters, all of which support brand-based filtering, AJAX updates, and mobile-ready layouts.
Does Using Brand Filters Affect My Store’s SEO?
If configured correctly, no. Use clean URLs, canonical tags, and noindex parameters for dynamic pages to avoid duplicate content issues while maintaining crawl efficiency.
Can Customers Combine Brand Filters With Other Filters?
Yes. Customers can apply brand filters alongside price, category, or size filters. Plugins with AND/OR logic allow advanced filtering for more accurate search results.
How Can I Improve the Performance of Brand Filters?
Enable AJAX filtering, use caching, and limit visible brand options to top brands. Indexing your brand taxonomy also speeds up queries in large WooCommerce stores.
Why Are My Brand Filters Not Showing Products?
Check if products are properly assigned to brand taxonomies. Re-save permalinks, clear cache, and rebuild filter indexes if using plugins with indexing features.
Are Brand Filters Mobile-Friendly?
Yes, most WooCommerce brand filter plugins offer responsive designs. Use dropdowns or slide-out drawers for better usability on small screens.
Do I Need Coding Skills to Create a Brand Filter?
No coding is required. Modern plugins provide visual editors, shortcodes, and widgets that let you add and customize brand filters easily from your WordPress dashboard.